VVOVOV Level Editor Guide
1. Create a new level
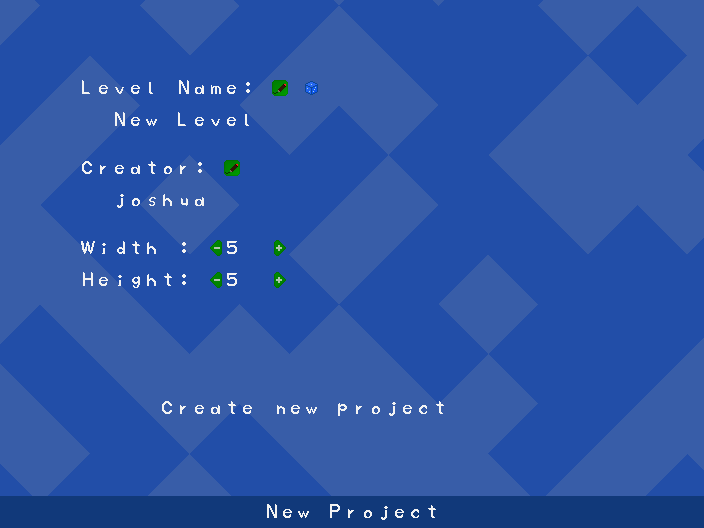
When creating a new level you have to set a level name, a creator name and the size of the level.
The Level Name will determin the filename of your level, the name that will be displayed ingame can be changed later. Click the pen enter a name and press enter to change the level name, or click the dice for a random generic level name.
The Creator Name can be changed at any point in time in the Level Setting (2.11) by default it is your username.
The Size can be incremented or decremented by clicking the arrows, after creating your level it can not be directly changed. By default it is set to 5 by 5.
Once you are done click "Create new project" and start building.
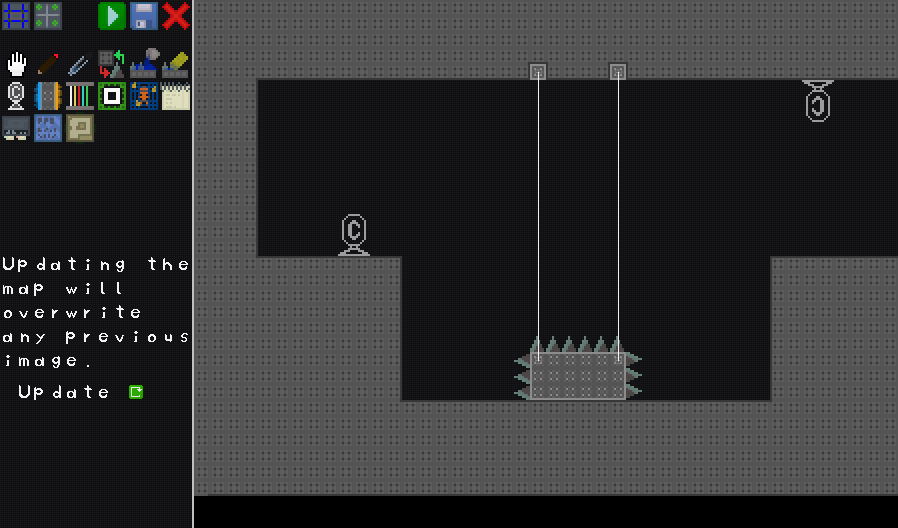
2. Tools
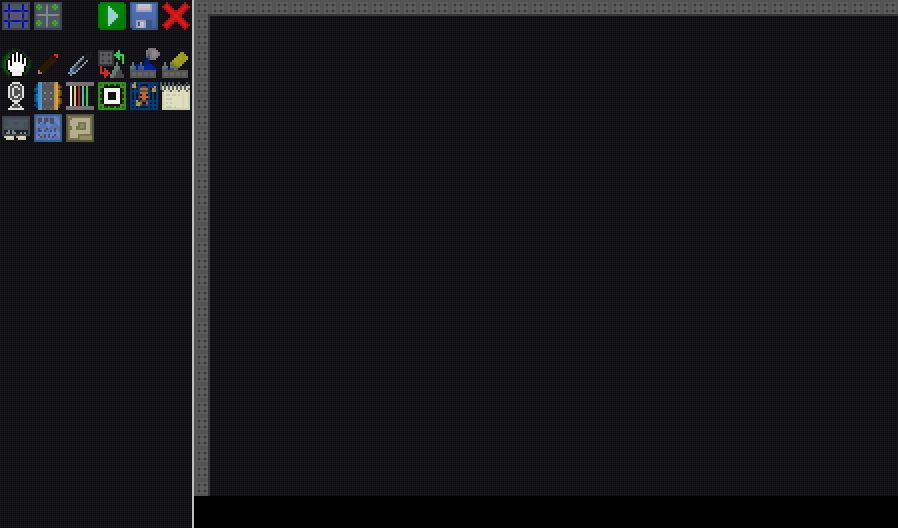
When opening the Editor, the game will open all relevant tools in a second window. The individual tools will be explained in the following section.
2.1. Room grid
By default you always see one room and can use the arrow keys or WASD to jump to another room. This setting should be used when working with lines portals, or entities. However when building it can be useful to see the edge between two rooms, by clicking on the icon in the top left or by Pressing F1 you can toggle if your view is locked to a single room. You can now use your arrow keys or WASD to move around freely. The edge between two rooms is marked blue and the edges at the sides of the level are marked red, since some mechanics work slightly different around those.
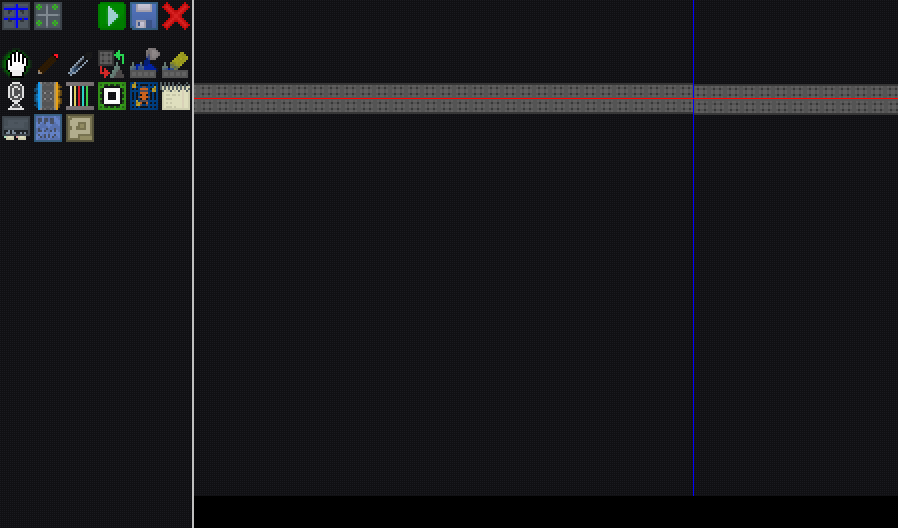
Be careful when filling a rectangle while working close to the edges of the map since, when you are in the top left room and move only slightly up and left, this can mean that you are now in the bottom right of the map.
2.2. Hand
The hand works only if your screen is not locked to single room, when having the hand selected you can hold down your mouse and drag the map around. This can also be achieved by pressing spacebar without clicking on the map if you have another tool selected.
2.3. Draw
While drawing the game will use a cyan square to indicate the block youre mouse is above.
2.3.1. Pen
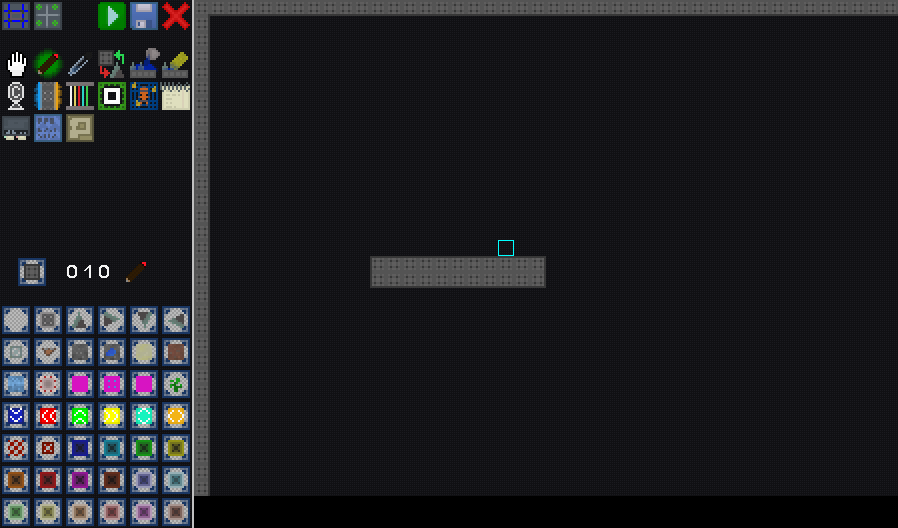
When selecting the pen, the editor will now display a preview of blocks you can use below the tools, you can click on these to select a specific block for drawing.
The block at the top identicates the blcok you have selected. To the right of it you can see the hexadecimal code for the color this block has in the png file.
You can edit it by clicking the pen next to it entering a color code and pressing enter. This will also allow you access to some other blocks (e.g.: Logic Blocks) which do not apear in the default pallet. The pen tool can be selected at any point in time by pressing "N".
Air counts as a block in the editor, to remove a block select and draw air over the block you want to remove.
2.3.2. Pick Block
When clicking with this tool instead of drawing, it will select the block you clicked on, you can select this tool by pressing "O". This allows you to not having to select a block on the left instead, while drawing you can switch to the block picker with "O" click on a block in the map, and go back to drawing with "N".2.3.3. Replace
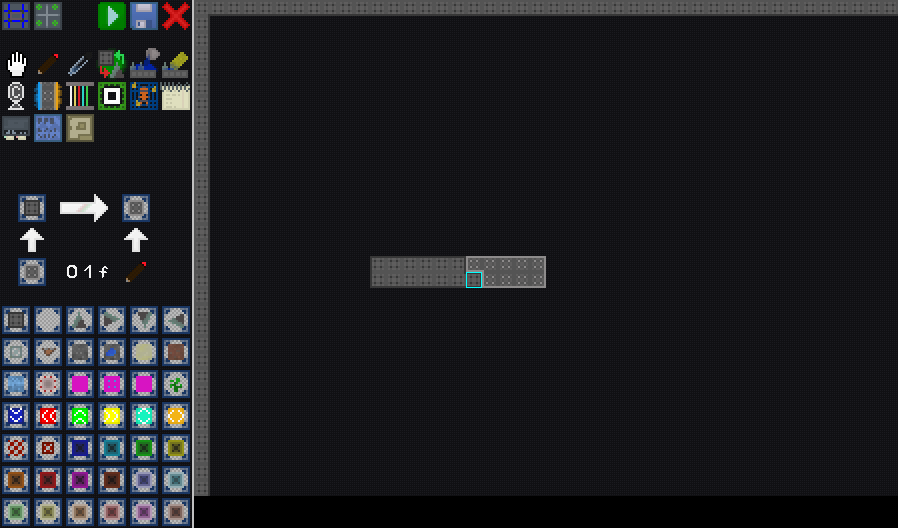
The replace tool works like the pen but instead of overwriting every block with a new block it only replaces a certain block with a new one. This tool has the same block selection the pen and the block picker have, but it also has an indicator which block gets replaced with which other block, click one of the two up arrows to copy the selected block into either the slot for the block that gets replaced, or select it as the block tp replace the other block with. In the image dark concrete walls would get replaced with white concrete walls.
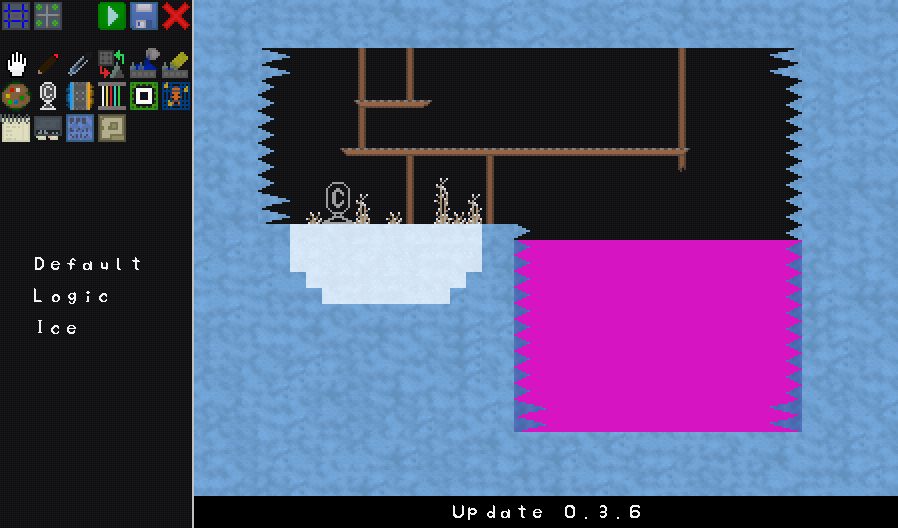
2.3.4. Water
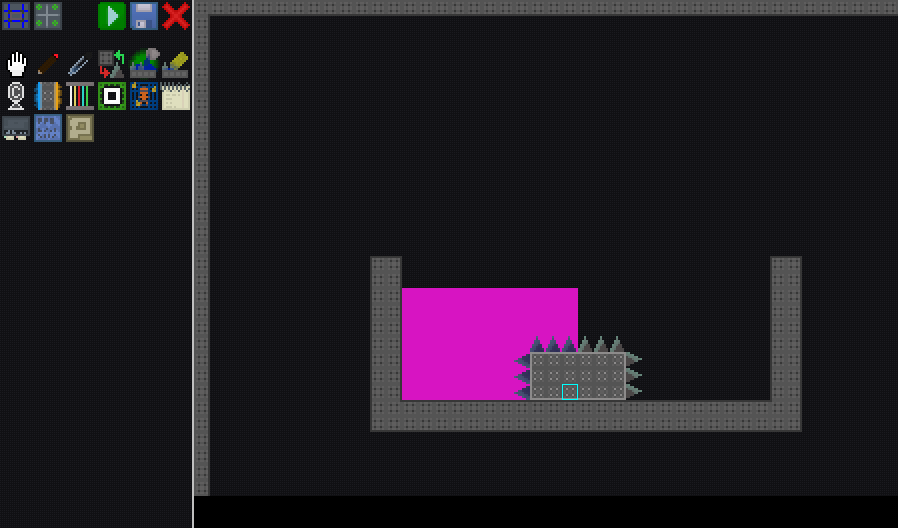
Instead of placing water and underwater spikes, you can build all of these without water and then select the water bucket, which works similiar to the replace tool, however it will automatically replace each block with the underwater equivalent of that block. You can also use the sponge to achieve the opposite effect. This can be useful if you want to change how high you have the water standing in a room that has a lot of different blocks.
As long as you are inside the editor the water effect is not applied, water will therefor show up as pink.
2.3.5. Lines and Rectangles
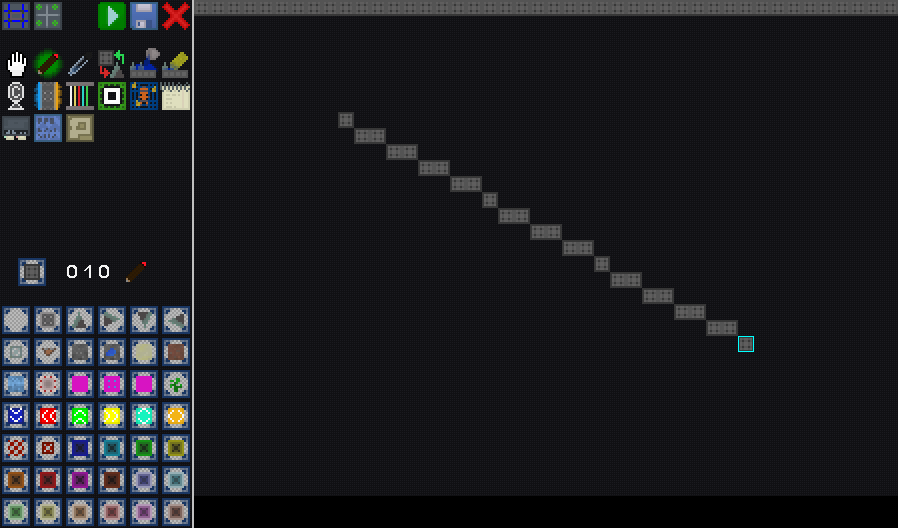
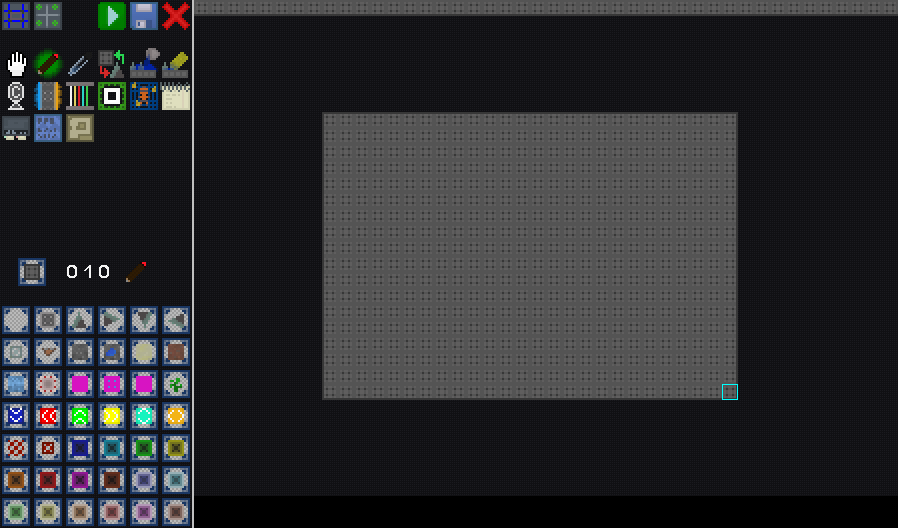
While using any of the previous drawing tools you can apply it in a line or on a rectangle, for example if you want to draw a line, click at one end, then move your mouse to the other end without holding your mouse button down, then click at the other end while you hold shift down, this will draw a line. In the same way you can press "<" to draw a rectangle between two corners. As mentioned earlier be careful when using these when working close to the edge of the map, they are however safe if you use them while having your screen locked to a room or while not moving around during the selection of the start and end point.
2.3.6. Palett (Added in Version 0.3.6)
With this feature you can access multiple color/block paletts, this allows you easy access to other blocks, that before could have only been used by entering the color code. This can be used to reset your palett to the deafult, you can use it to get easy access to logic blocks. However for them to work you will need to enable them for this room (See 2.10 Room Settings). You can also use this to get access to the ice/snow themed blocks (Added in Version 0.3.6) including ice spikes long ice spikes which also come with an underwater variant and frozen grass.
2.4. Checkpoints
You can place checkpoints by leftclicking and remove them by rightclicking, repeatedly clicking on a checkpoint will rotate it, you will always place new checkpoints in the direction of the last one, you can also middleclick to rotate the selection without placing a checkpoint. Checkpoints are stored as a color like blocks in the top left block, drawing over it with a block will therefor remove the checkpoint.
2.5. Portals
With this tool you can set where portals spawn when you enter a room, they will only spawn there if the player has not yet colected the portalgun for that color. On the left you can choose what portals can be spawned when entering this room, click the + to add a color or click the X to remove it. You can grap a portal at the marked corner and drag it around rightclick to rotate. You can't drag a portal outside of a room. If you have another tool selected portals still show up in the background but you can't select them from there you will have to switch to this tool.
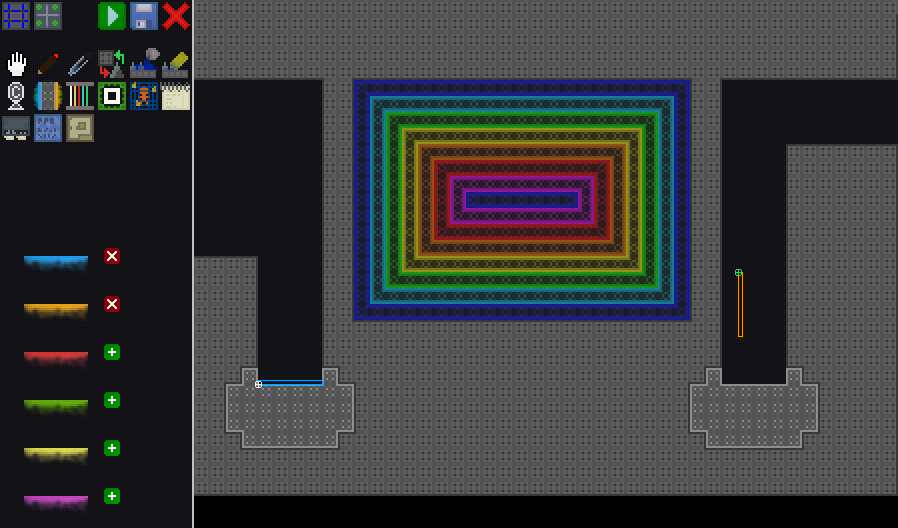
2.6. Lines
You can add a line by clicking on one off the options at the bottom left, by default they will just create a new line in the middle of the screen, the same way you were able to drag around portals you can now drag around the ends of a line. By defaut they will snap to the center of a block you can however use F2 to switch between snapping to a center, snapping to a corner and moving around freely. Press remove on the left to remove the line you have currently selected. You can also set assign a name to a line, which you only need if you want to manipulate this line by a script.
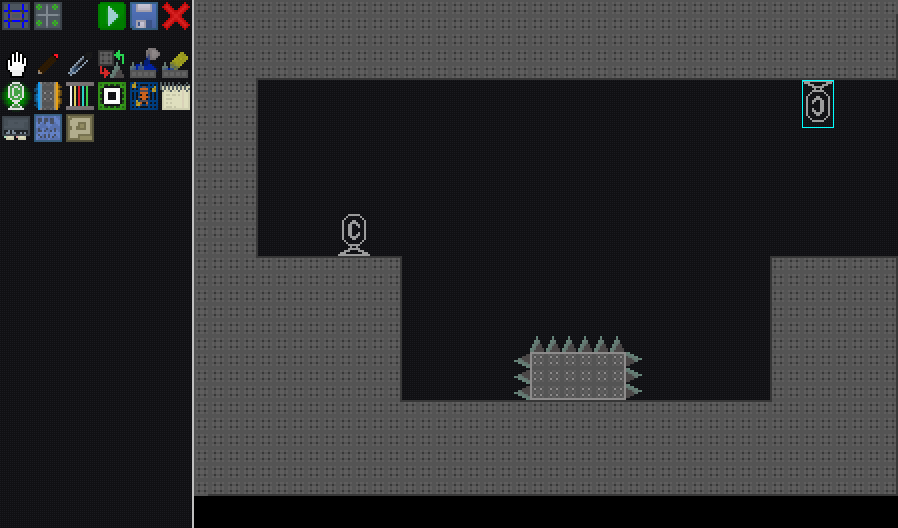
2.7. Entities
When selecting this tool, you will get the options to add diferent entities. When editing a single entity, this tool will instead show the settings for this entity. You can use the Plus and the Hammer Icon to switch between editing and adding entities. For each entity the editing screen contains the option to name the entity, wohever as of now there are very few uses for named entities. At the bottom of the screen you can also click on remove to remove the selected entity. Entities can be moved in the same way you can move around lines. Cakes and Elevators do not have any extra settings, the setting for the other entities will be explained in the following sections.
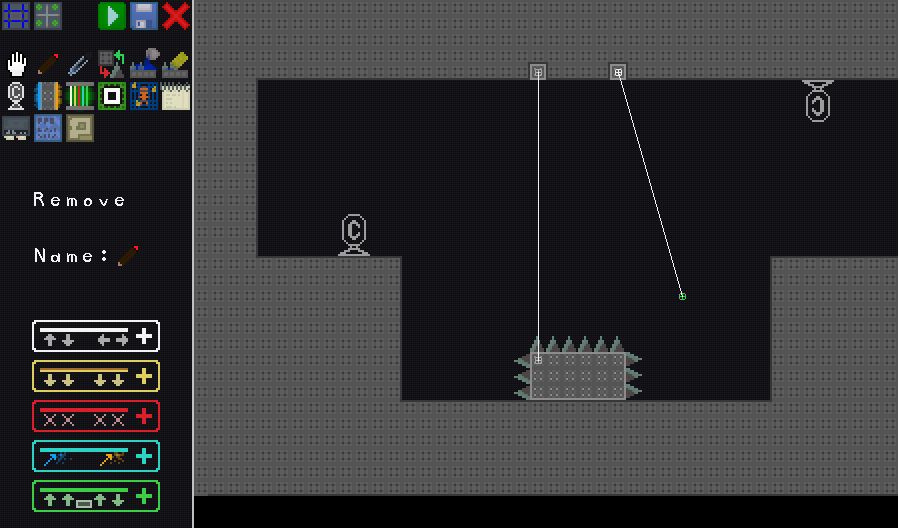
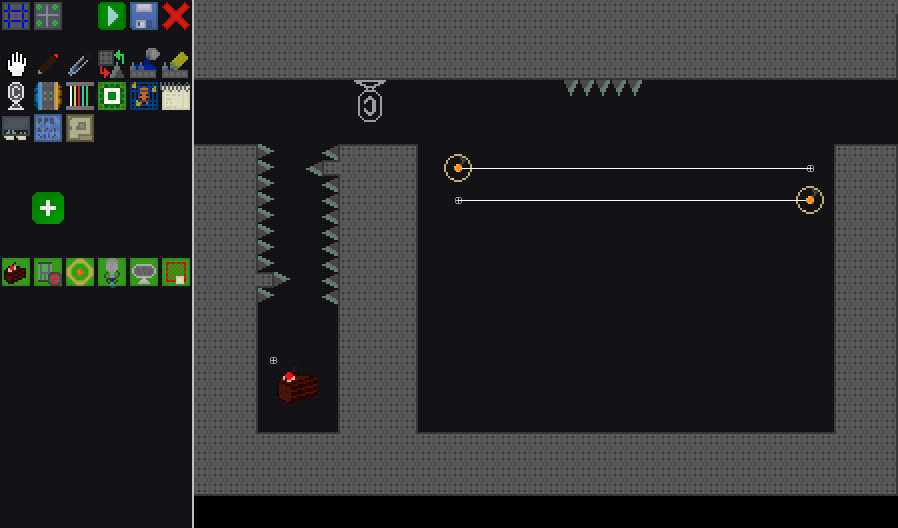
2.7.1. High Energy Pellets
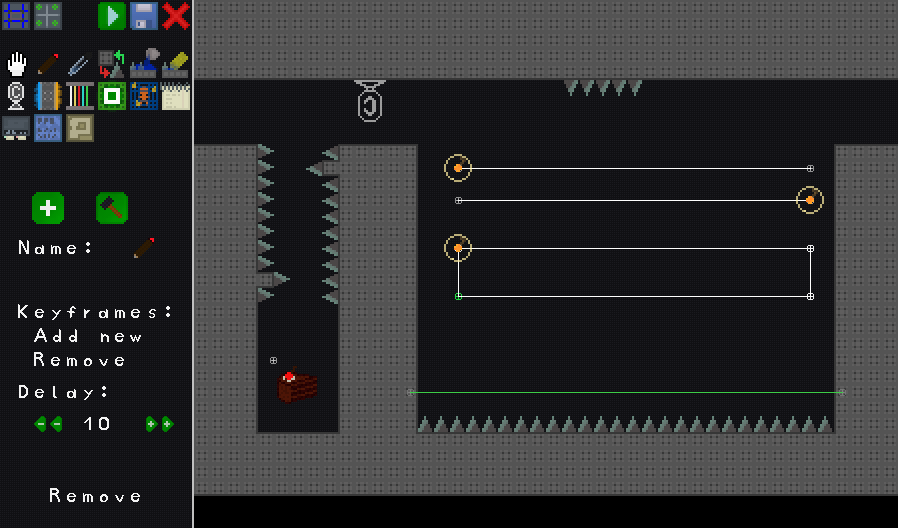
High energy pellets follow a set pattern, by default a new high energy pellet will move back and forth between two points. On the left you can click "Add" to add a new Keyframe after the selected one, or click "Remove" to remove the selected one. At the bottom you can change the time it takes the pellet to get from the last to this keyframe, use the "+" or "-" to add or subtract, 1 or 10 ticks, 50 ticks = 1 second.
2.7.2. Portal Gun Holder
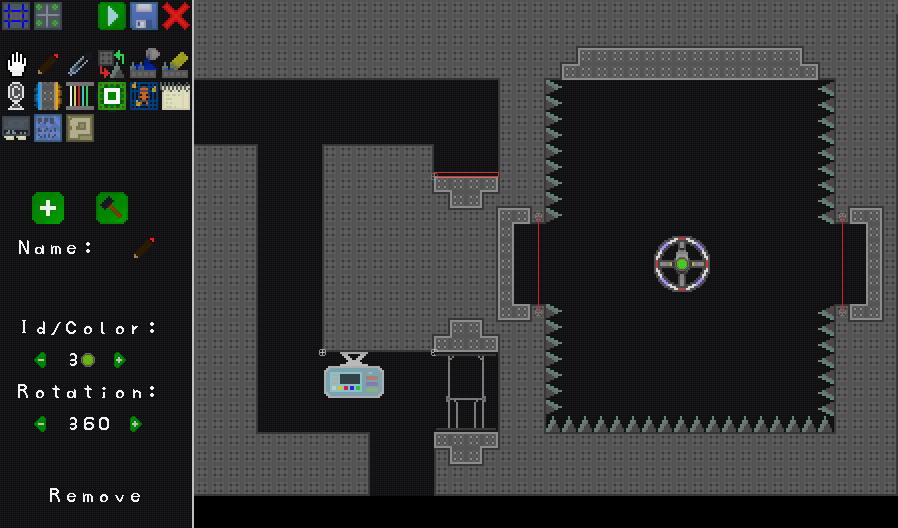
For this entity you can change the id of the portalgun, 0 for blue, 1 for orange, etc. You can also edit the initial rotation, the portalgun will still always shoot left, up, right and down, while rotating clockwise.
2.7.3. Terminals
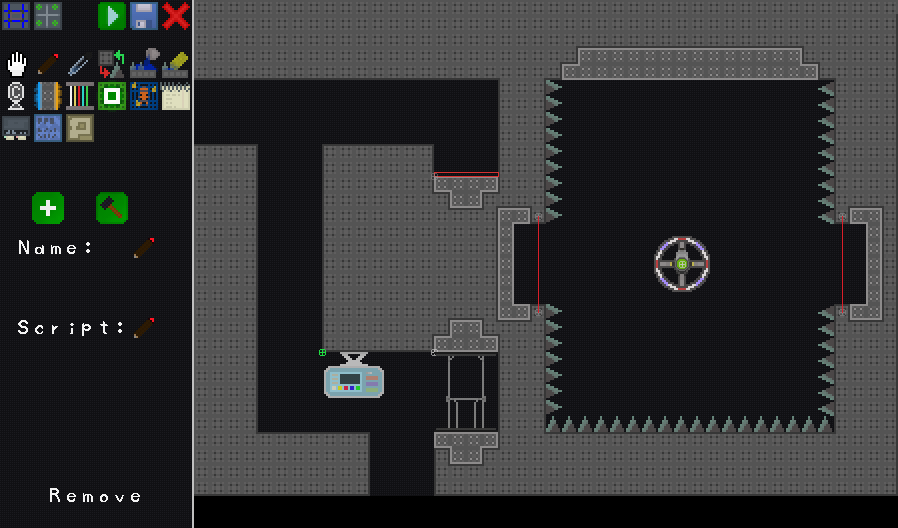
You can rotate a terminal by rightclicking and assign a script to it, your script will not be created automatically if it does not yet exist, use the Script Tool 2.9 to create and edit scrpits.
2.7.4. Trigger Zone
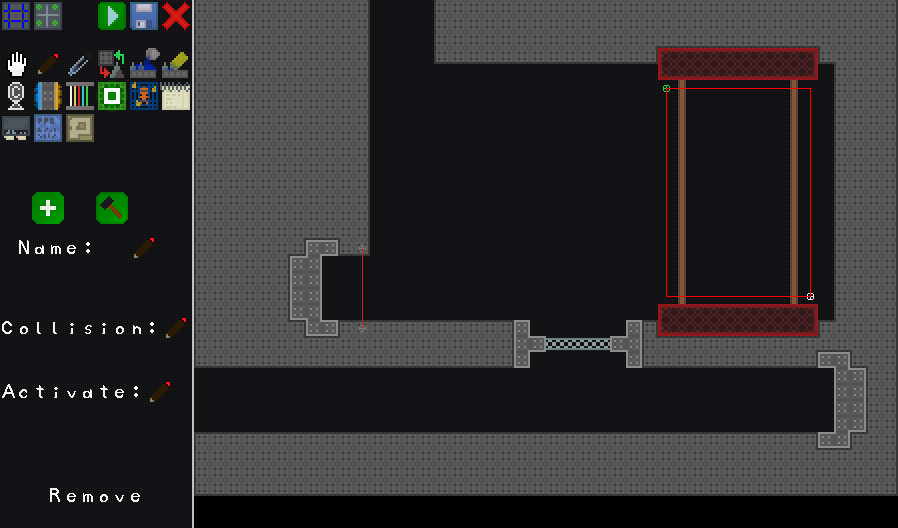
This entity works similiat to a terminal but it is not visible ingame, you can move two of the corners to give it an arbitrary size. It also has two scripts you can add to it. The collision script will be called every frame the player is at least partially inside the selected zone. The activation script will only be called when the player presses enter while standing in this zone.
2.8. Spawnpoint
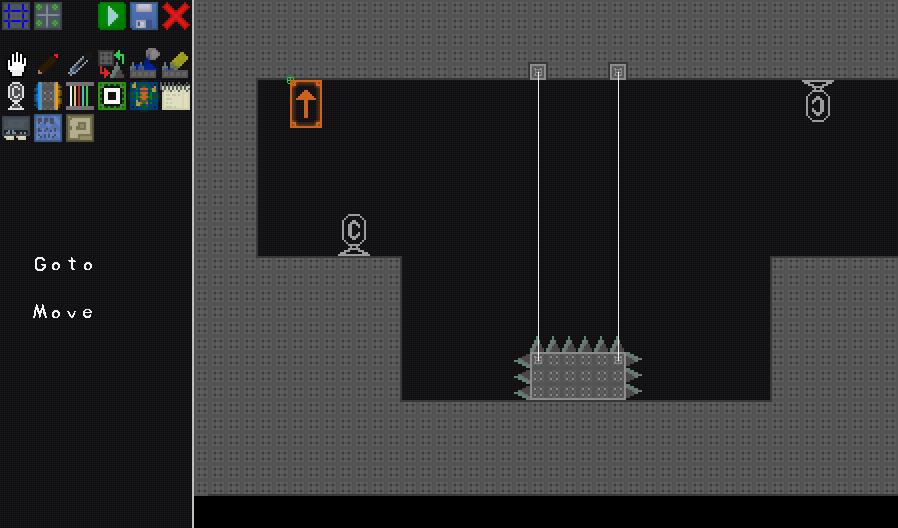
This tool has only two extra buttons on the tool screen, using "Goto" you can always jump to the room that currently contains the spawnpoint. It can be moved around like a portal, rightclick to rotate. You can only move it around inside one room, if you want to move the spawnpoint to another room, go to the room you want the move the spawnpoint to and click "Move", this will move the spawnpoint to the selected room.
2.9. Scripts
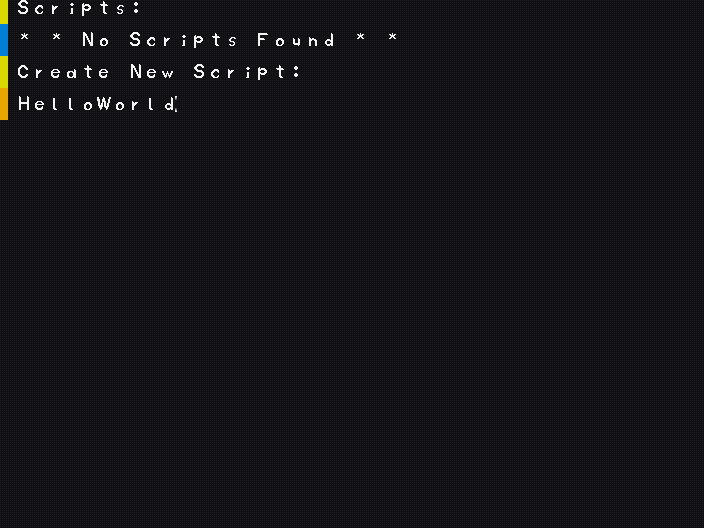
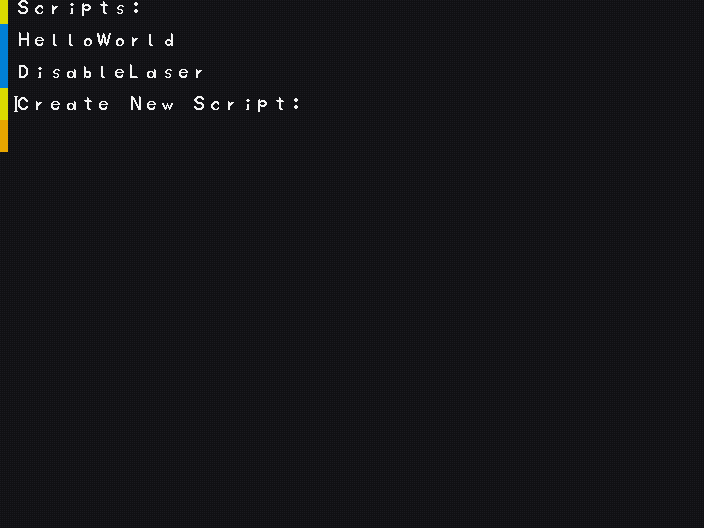
This tool will display all existing scripts and allows you to add new ones ore romeve them. Below the line "Scripts:" it will list all existing scripts, if there are none it will tell you so. To add a new script, move to the bottom below the line "Create New Script" and enter the name for the script. Press enter to create it, if successfull the script will show up in the list below. To remove a script move the cursor to the line of this script in the list and press backspace, this will delete the script. Press enter on a script in the list to edit it, you can use the Escape key to return from editing a script to the list and from the list to the regular level editor.
A new script will only contain the line:
>>CODE<<
The following script, would display the text "Hello World!" at the position [5,5] on the screen in the color #4080ff.
>>CODE<<
SHOWTEXT
>5
>5
>4080ff
>Hello World!
To learn more about scripting read "3. Scripting"!
2.10. Room Settings
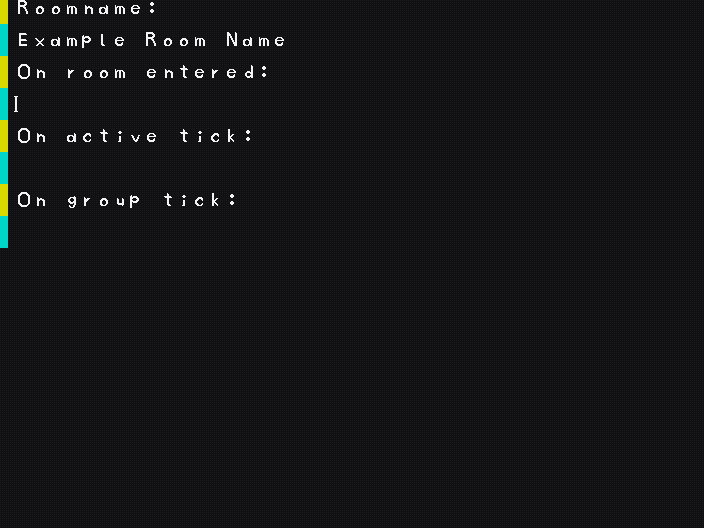
In the room settings you can change the roomname, you can also assign a script that will be executed when the player enters the room, as you can assign one that will be executed every tick the player is in the room and one that will be activated if the player is in this room group. Room groups can currently not be created withing the editor.
2.11. Level Settings
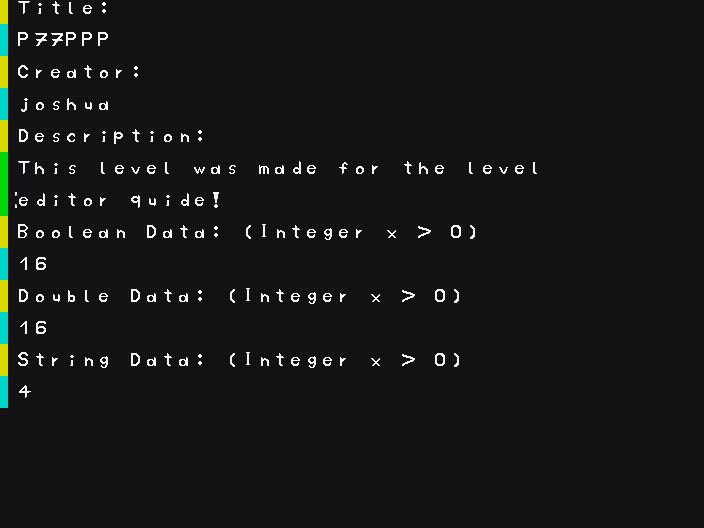
In the level settings you can change the level and author name, you can also add an arbitrary number of lines as the description. At the bottom you can select how many variables you need for scripting, note that only these will be saved if the player exits your level.
2.12. Map
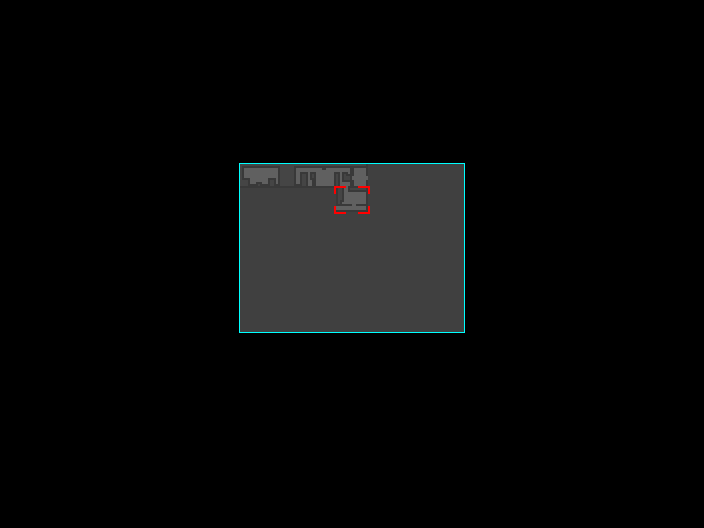
The map tool allows you to create a procedural overview map. It will be created when you click update it will also overwrite, the previous image you had as the overview, so if you want to manually draw a map, you should avoid this tool. The refresh arrow or the checkmark will identicate if the map is currently up to date, it will go back to the refresh arrow if you place any blocks in the level, as doing so could change the overview.
2.13. Saving and Autosaves
To force a save click the save icon, right next to the exit button on the top of the tool screen. Otherwise the editor will save if you:- exit the editor,
- create a new script,
- edit a script,
- delete a script,
- update the map,
- or playtest your level.
2.14. Playtesting and Cheats
Click the green play button build and start the level, you will always start at the spawnpoint with all variables set to the default value false, 0 or an empty string. You can also not save while playtesting, pressing escape will return you to the editor. To get to a cretain part of the level quicker you can use some of the following cheats, press "P" enter a command and press enter. Using this you can do the following stuff:
- Switch Gamemodes
m [id]
0 for default playstyle, 1 for invincibility, 2 to move around freely (No gravity, move in all directions, even through walls and enemies, spacebar to rotate by 90°). -
Place a checkpoint at the position you are.
addcp -
Change variables.
edit {b|d|s} [id] [value]
Use b,d or s to change a boolean, double or string, use the id to select which variable, and assign a new value. -
Give or Take away a portalgun.
givepg [id]
takepg [id]
Use the id to select which portalgun you want to give or take away, 0 for blue, 1 for orange, etc. -
Print all variables to the command line
printmd
This only makes sence if you start the .jar from the command line. -
Summon particles
particles
It's pointless but it exists.
3. Scripting
The VVOC Scripting language was initialy made for displaying text and selections, over the time I added variables and added more options in which these scripts can interact with the level, except for having a set number of variables you can use, which you however can set as high as you want as long as you have enough memory on your computer, not meaning you should do this, as the save file would get very big, the scripting language otherwise is in theory turing complete, meaning it could do any computation you want it to do.
Scripts are saved in there own file, so if you want to create any more complicated scripts, you might want to use a normal text editor instead of the ingame one.
3.1. Simple Text and Selections
In a VVOC Script the line:>>CODE<< marks the start of a script your code should start on the next line.
If you are using 0.3.6 or later you can now have empty lines or comments by starting a line with a //, however no characters in front of that are currently allowed. Every new line which does not start with a > will be interpreted as a new command, however most command need aditional parameters, these are added after the command on the same line or on the following lines starting with a >
A standard example for this would be the command SHOWTEXT it will need a position on the screen where to display the text, the color of the text and an arbitrary amount of text to be displayed.
>>CODE<<
SHOWTEXT
>5
>5
>4080ff
>Hello World!
Would show the text "Hello World!" at the location [5, 5] in the color #4080ff, if you want more text to be displayed you can add as many lines of text as you want, you just need to keep the position and the color, so it could look like this:
>>CODE<<
SHOWTEXT
>5
>5
>4080ff
>Hello World!
>Next Line
>And another one
>Ok, that's it
Each of these lines will be displayed as one line it won't be split into multiple lines if it is too long. It will also display each line on it's own and the player has to press enter to see the next line.
However if you want to see more text at the same time you can instead use the command SHOWTEXT_2
>>CODE<<
SHOWTEXT_2
>1
>1
>4080ff
>Hello World!
>Next Line
>And another one
>Ok, that's it
This will display as many lines as it can on the screen at once, so if you start at the top it will show 10 lines and the player then has to press enter to see the next 10 lines.
To quickly jump to another section of the code VVOC has a LABEL and GOTO system. Each Label should have a unique number wich needs to be added on the same line after the command it does not do anything if it appears as code to be executed, the numbers for LABEL's need to be integers, they can be out of order or you can skip numbers. If the code however gets to a GOTO it will jump to the LABEL with the same number, this jump can be forwards or backwards in the script. There can be multiple GOTO's leading to the same label. This allows for the creation of infinite loops, since this would force the player to quit the game, you should be careful to not accidentally create on.
>>CODE<<
LABEL 1
SHOWTEXT
>1
>1
>4080ff
>Label 1 had no effect.
GOTO 2
SHOWTEXT
>1
>1
>4080ff
>This text will be skipped.
LABEL 2
SHOWTEXT
>1
>1
>4080ff
>This text won't!
LABEL 3
SHOWTEXT
>1
>1
>4080ff
>Help, I'm stuck in a loop.
GOTO 3
In order to create some interaction you can use the CHOOSE command. Each option below will jump to a cretain label, these lines should start with the number of the label then have a # as a seperator and then have the text of the option. You could create this for example:
>>CODE<<
LABEL 1
SHOWTEXT
>1
>1
>4080ff
>Pleace make a decission!
CHOOSE
>1#Can you repeat that?
>2#A
>3#B
>99#Should exit this script
LABEL 2
SHOWTEXT
>1
>1
>4080ff
>You choose A
GOTO 99
LABEL 3
SHOWTEXT
>1
>1
>4080ff
>You choose B
LABEL 99
3.2. Simple Boolean Logic
Some situations might however require some more complicated interactions than a simple branching text selection. To achive branching with a selection by the player you can use an IF command. If the condition is true the next line will be executed, otherwise the next line will be skipped. Putting a GOTO on the line after an IF will however allow for arbitrary long branches.
To use an IF command you will need to use variables, these will be explained in 3.4. in more detail, for now we are just going to use a simple boolean variable, so that it works in a similar way as flags in VVVVVV.
To do this we are are going to add the line
bm0 name
before the start of the code in this b stands for boolean, m stands for Mapdata, meaning that this is a global variable which can be accessed by any script and it will be saved if the player saves, quits and loads the save again. 0 indicates that it is the 0th element in the global array. By default the boolean array has a length of 16, meaning the elements are numbered from 0 to 15. name is the name of the variable, in the rest of the script you will refer to it with this name.
An example how this can be used could look like this:
Script 1:
bm0 hasChoosen
bm1 choice
>>CODE<<
IF hasChoosen
GOTO 98
MOVE 'true hasChoosen
CHOOSE
>1#I choose A
>2#I choose B
LABEL 1
MOVE 'false choice
GOTO 99
LABEL 2
MOVE 'true choice
GOTO 99
LABEL 98
SHOWTEXT
>1
>1
>4080ff
>You have allready made a choice.
LABEL 99
Script 2:
bm0 hasChoosen
bm1 choice
>>CODE<<
IFNOT hasChoosen
GOTO 1
IFNOT choice
SHOWTEXT
>1
>1
>4080ff
>You selected A!
IF choice
SHOWTEXT
>1
>1
>4080ff
>You selected B!
GOTO 99
LABEL 1
SHOWTEXT
>1
>1
>4080ff
>You have not yet made a choice.
LABEL 99
In this example the player can use the first script to make a choice between A and B, attempting to use the script again will output a message that the player has allready made a choise. If the player will use the second script it will say what choice was made or if there has not yet been made one. In this example 'true and 'false refer to these boolean values, they start with a ' to mark them as a boolean and not a variable named true or false. The MOVE command will copy the first value after it to all further variables. In this case it will just copy the values true or false to the variable after it. MOVE 'false choice could in theory left out as the default value for all boolean variables is false, when the player starts a new game. IFNOT is the exact opposite to the IF command, in the way that the next line will only be skipped if the condition is true.
An example for where an if could be useful, is to have multiple zones in a level. Each zone will set a certain variable to true when the player has completed it. The following script could then be used so that the player can complete the level, once all zones are completed.
bm2 zone1
bm3 zone2
bm4 zone3
>>CODE<<
IF 'true zone1 zone2 zone3
GOTO 1
SHOWTEXT
>1
>1
>4080ff
>Level complete!
LEVELCOMPLETE
GOTO 2
LABEL 1
SHOWTEXT
>1
>1
>4080ff
>You are not yet done
LABEL 2
An if with multiple values after it will interpret these as a true condition if all values are equal. The 'true is neccessary as all zone variables being false would otherwise also count as a true condition. The LEVELCOMPLETE means that the player has completed the level, as of now this will not show any extra effects and just returns the player to the main menu once the script is done. Currently VVOVOV does not keep track of what levels a player has completed, this might be added in the future. This also means that once this line gets executed, the player has no option to stay in the level. Idealy the player should be aware that a certain event will trigger this. So you could perhaps add a CHOOSE option in the script that skips the LEVELCOMPLETE command.
A few other commands that might be useful are:
-
INV variable1
This command inverts all variables after it, in this case only "variable1". But it also works for multiple variables. -
AND variable1 variable2 answer
This command works as an And operator on all variables except the last and then writes the result to the last variable. It requires at least three variables to make sense.
OR variable1 variable2 answer
Just like the AND command, except for this working like an Or operator.
3.3. Simple Line Interactions
When building a level you might want to include lines, that can be moved or disabled. At this point you should keep in mind, that changes to lines will be saved with the game, they will not reset when leaving the reentering the room or even when saving and quiting and loading the save. Also disabled lines cannot be re enabled if something like this is neccessary instead move them far off the screen and move them back when they are needed again.
A script for disablig a line could look like this:
bm5 disabled
>>CODE<<
IF disabled
GOTO 1
SHOWTEXT
>1
>1
>6a6969
>Disabling Line!
DISABLE
>The_Name_Of_The_Lie
MOVE 'true disabled
GOTO 2
LABEL 1
SHOWTEXT
>1
>1
>6a6969
>Line has allready been disabled!
LABEL 2
In this example the DISABLE command is used, on the next line it takes an additional parameter that isn't a variable, the line therefore starts with an >, this being the line name. It will then disable all lines on the map with this name. This script also keeps track of if the line has been disabled, however if the DISABLE command got called again it wouldn't do anything.
A script for moving a line back and forth could look like this:
bm6 state
>>CODE<<
IF state
GOTO 1
MOVE_LINE
>0
>9
>The_Other_Line_Name
GOTO 2
LABEL 1
MOVE_LINE
>0
>-9
>The_Other_Line_Name
LABEL 2
INV state
SHOWTEXT
>1
>1
>6a6969
>Line Moved!
Here the MOVE_LINE takes three parameters on the following lines. The first two being the distance to move the line along the X and Y axis and the third beeing the line name again. In this case a line that was initially in the upper position down by 9 blocks and back up if used again. The state variable here is used to keep track of the position of the line.
3.4. Variables
Section does not yet exists3.5. Commands
Section does not yet exists3.6. Advanced Examples
Section does not yet exists4. Files
All game files are stored in ~/AppData/Roaming/Heptaveegesimal/VVOVOV/ with ~/ being your home directory. The following three directories would be important in regards wo custom levels:- CustomMaps/ is where you would need to put a level in order for it to show up when starting a new game. If you want to play a level by someone else this is where you would need to put it.
- Editor/InputFiles/ is where all the levels you have started building are located. This however is the version of the level that the editor uses. This version however will not be recogniced as a level if placed in "CustomMaps/".
- Editor/Builds/ is where the versions of your level are located once they have been converted to a version that is more efficient to load. If you want to share your level this is the version you would want to upload.
4.1. What is the point of the too versions of the level?
The editor version of the level contains all information about a level in a way they are easy to understand even with a regular text editor. Scripts are stored in a seperate file each. This would allow you to use a regular text editor for scripting instead of the ingame one, definitely recommended for long and complicated scripts. The file called "data.txt" contains all other information about your level in a Json format. The map and the overview of it are stored as ".png" files, if you want to give your level a custom overview, unlike the procedural one described in 2.12 you can edit it here.However this format of the level is relatively inefficient to load when wanting to play a level. So when you playtest your level it will be converted to a format where it just consist of a bunch of binary files, which just contain a compact version of instructions for the game along the lines of "Go to this room, name it like this, place these entities with this data". This format will also create a very small file called "info.bin" containing only the information required, to show the level as an option when a player starts a new game. Meaning that the game would not have to go through a potentially large level file in plain text just to find the decription in it. But can instead just check this about 100 byte file.
Level files are also not automatically placed in "CustomMaps/" when playtesting your level, to avoid potentially corrupted level files ending up in there.
4.2. TL;DR How do I share my level?
Playtest your level!Upload the folder of your level located at "~/AppData/Roaming/Heptaveegesimal/VVOVOV/Editor/Builds/".
And the person that downloads your level has to put the level folder in "~/AppData/Roaming/Heptaveegesimal/VVOVOV/CustomMaps/"
If you also want them to be able to work on the level, you will need to upload the level folder in "~/AppData/Roaming/Heptaveegesimal/VVOVOV/Editor/InputFiles/" and the other person will have to put this version in the same folder.